News
![]()
![]()

Introduction:
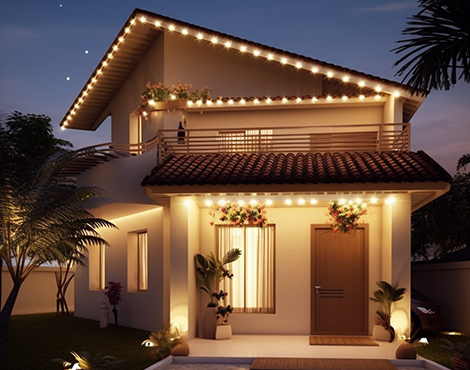
Enhancing the exterior lighting of your home not only adds beauty but also improves security and functionality. Smart outdoor Permanent lights are a popular choice for homeowners seeking convenience, energy efficiency, and advanced control options. In this guide, we will provide you with step-by-step instructions on how to install smart outdoor Permanent lights. From essential tools to important considerations, we'll help you transform your home's outdoor lighting experience.
Planning and Preparation:
Before you begin the installation process, it's crucial to plan and prepare accordingly. Assess your outdoor space, determine the desired locations for the Permanent lights, and consider factors such as power source availability and wiring requirements. Make a list of the necessary tools and materials to ensure a smooth installation process.
Essential Tools and Materials:
To install smart outdoor Permanent lights, you will need the following tools and materials:
Drill and drill bits
Screwdriver
Wire cutters/strippers
Electrical tape
Wire connectors
Mounting brackets
Smart outdoor Permanent lights (compatible with your chosen smart home system)
Installation Steps:
Step 1: Turn off the power to the area where you will be installing the lights by switching off the circuit breaker.
Step 2: Position the mounting brackets on the Permanent, ensuring they are securely attached.
Step 3: Run the electrical wiring from the power source to each mounting bracket, following proper wiring guidelines and local electrical codes.
Step 4: Connect the wiring from the lights to the corresponding wires in the mounting brackets using wire connectors, making sure to match the color-coded wires.
Step 5: Securely attach the smart outdoor Permanent lights onto the mounting brackets using screws or other provided fasteners.
Step 6: Double-check all connections and ensure they are properly insulated with electrical tape.
Step 7: Restore power to the circuit and test the functionality of the smart outdoor Permanent lights.
Important Considerations:
Ensure proper weatherproofing and protection for the wiring connections and light fixtures to withstand outdoor conditions.
Follow all safety guidelines and consult a licensed electrician if necessary.
Sync and configure the smart outdoor Permanent lights with your chosen smart home system or hub for advanced control options.
Conclusion:
By following this comprehensive guide, you can successfully install smart outdoor Permanent lights and elevate the exterior lighting of your home. Enjoy the convenience of controlling your outdoor lighting with advanced features like scheduling, dimming, and integration with your smart home system. Enhance the curb appeal, security, and overall ambiance of your property with these energy-efficient and aesthetically pleasing lighting solutions.